Getting in the Zone!
Zoning (formerly known as windowing) on a display is nothing new to the world of Daktronics. It’s the unique aspect of our control platforms that allow the same physical display to have multiple looks or designs using layers that fit together like a jigsaw puzzle with rectangular pieces. Understanding how zoning works is one of […]
Daktronics Control Panel on 9/1/2015
Categories: Pro Sports and Colleges
 Zoning (formerly known as windowing) on a display is nothing new to the world of Daktronics. It’s the unique aspect of our control platforms that allow the same physical display to have multiple looks or designs using layers that fit together like a jigsaw puzzle with rectangular pieces. Understanding how zoning works is one of the key factors for a successful show setup and is one of the main concepts we focus on during our on-site trainings.
One of our recent video additions to the Daktronics Control Systems YouTube channel is a tutorial and explanation of this concept. The piece provides an animated visual of how a group of zones fit together to create an in-game L-bar look, an auxiliary look, and a full screen look.
Introduction to Display Zoning 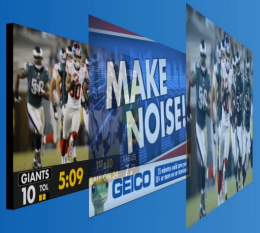
The majority of planning and configuring zones happens during installation as engineers and trainers configure the system, but zones can be edited at any point in the life of the display. Some use a different set of zones for their different event types that happen in the facility. It’s also common to give an existing display a fresh new look by re-zoning a display entering a new sports season.
For questions or assistance with zoning on your display, feel free to reach out for technical support. Go to www.daktronics.com/support for different ways to reach us.

This post is by Adam Kaminski- Daktronics Field Customer Trainer