Small Display Help – Using the Character Map to Add Interest
Many times, owners of smaller displays think they are limited to text only. Not true. If you own a smaller display, you can use the Character Map to create holiday presentations, school presentations, weather-related presentations, and more! If you are just starting out and want to do something easy, insert a character that has to […]
Daktronics Commercial Software Training on 11/12/2014
Categories: Venus 1500 Training
Many times, owners of smaller displays think they are limited to text only. Not true.
If you own a smaller display, you can use the Character Map to create holiday presentations, school presentations, weather-related presentations, and more!
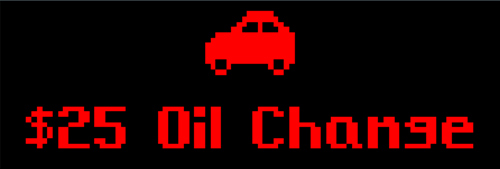
If you are just starting out and want to do something easy, insert a character that has to do with your business or sale. In this example, we are using one of the vehicles in the character map to help advertise our oil change business.
- Open a new presentation in Content Studio.
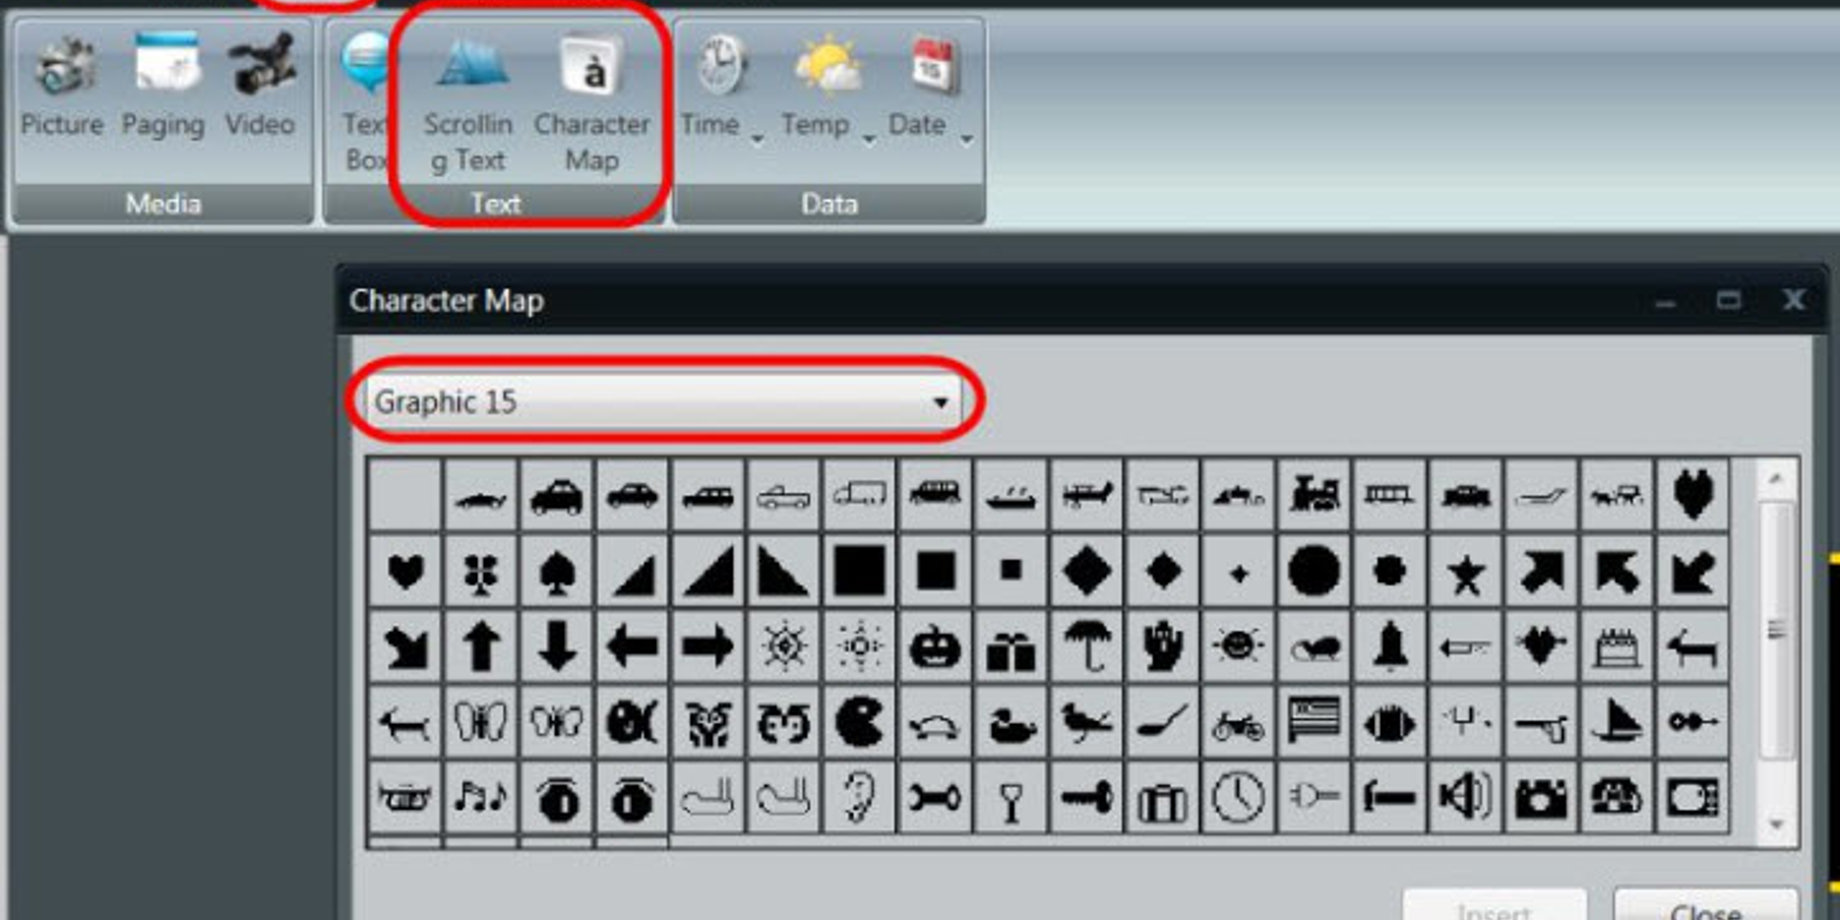
- Click on the Insert Tab; then click on Character Map from the Text section.
- Change the font type to Graphic 15 (or if display is smaller, Graphic 6 and Graphic 7 are options).
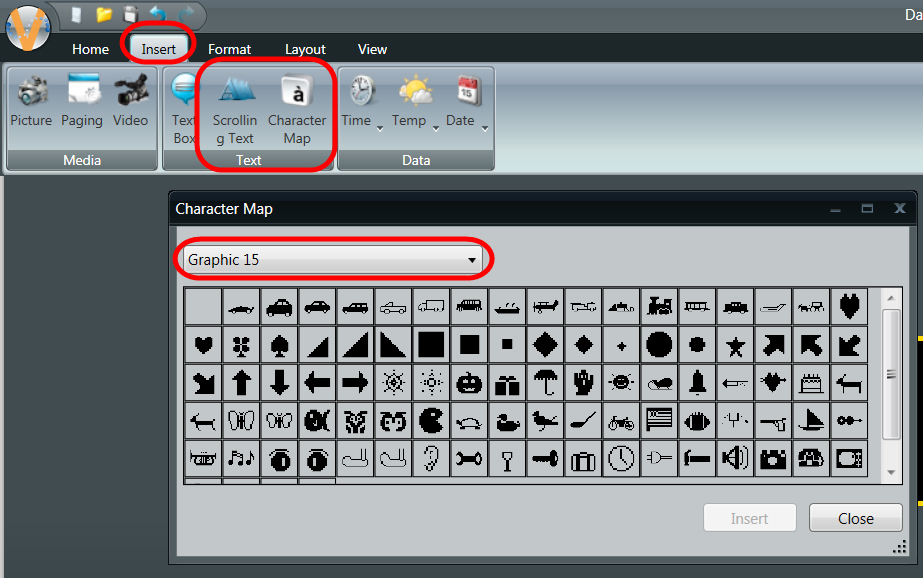
- Click on the vehicle character that you want to use.
- Click Insert, then Close.
- Next, enter your text.TIP: Make sure and change your font from Graphic to one of the other Venus fonts, or you’ll end up with a line of characters instead of text!


Now… if you want to jazz this up a bit, let’s make another one with the car driving across the display. Adding some motion will attract the eyes of passersby.
- Open a new presentation in Content Studio.
- Click on the Insert Tab; then click on Scrolling Text (right next to Character Map) to launch the Scrolling Text Import Window.
- Change the font to Graphic 15 (or Graphic 6 or Graphic 7).
- Click this toolbar icon “á” to launch the Character Map.
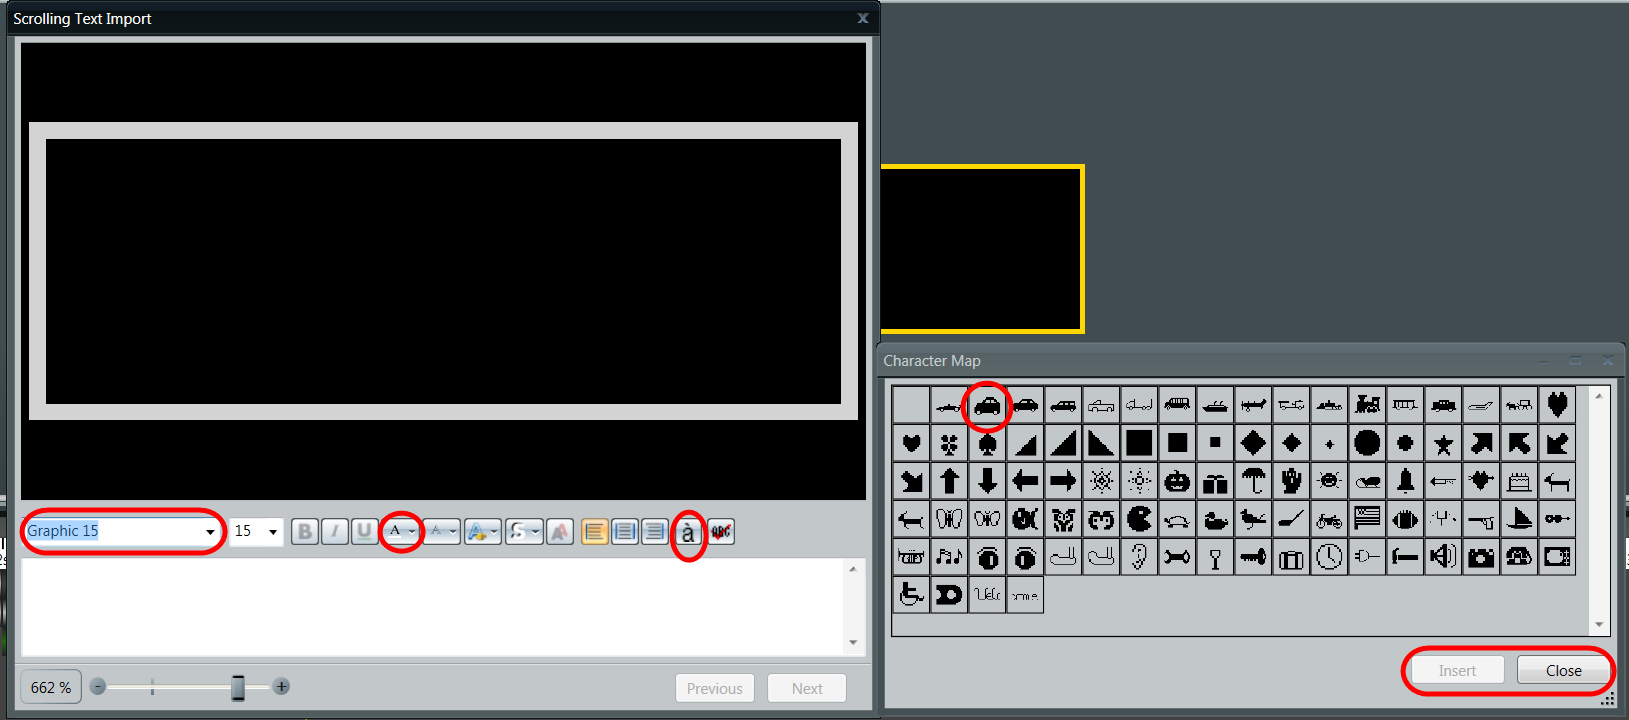
- Select the character you want to use; then select Insert and Close.
- If you have a color display, you can change the color of the character simply by highlighting the character in the white box, and then clicking the dropdown next to the first “A” icon in the toolbar. The dropdown offers many different colors. If your display is red or amber, just leave the color as is.
- Once the color of the character is what you want, click on Next in the bottom right corner to move to the next step.
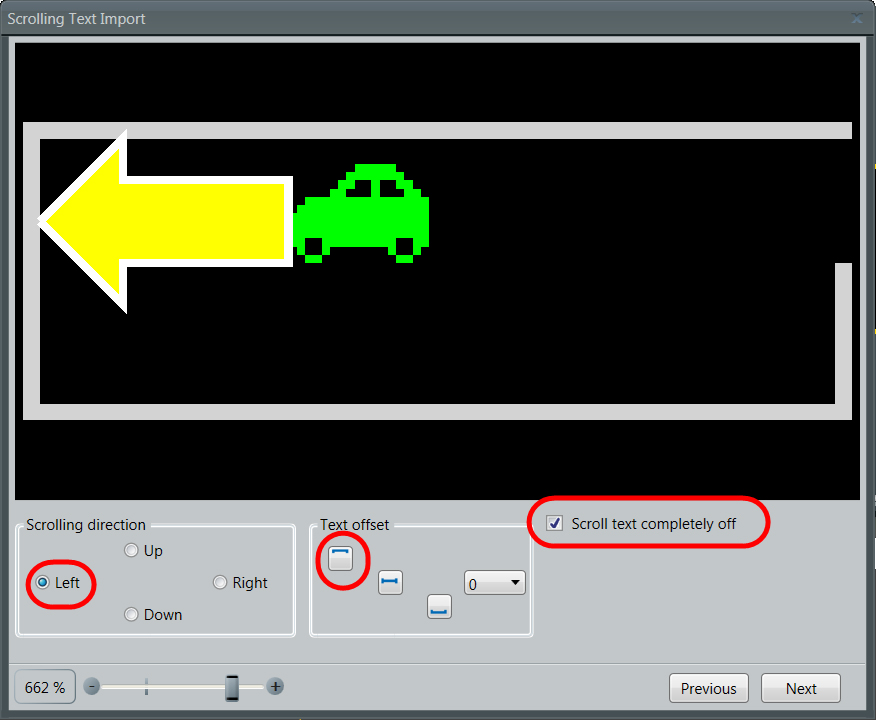
- Choose the Scrolling Direction for the scrolling text. We’ll leave it at Left, which means it will enter on the right and scroll across the display to the right.
- Choose the Text Offset to decide where on the display you want the car. I’m choosing to have the car at the top of the layout. Leave the box for Scroll text completely off check marked, so the car will drive all the way across the display. Click Next.


- This last window lets us determine the speed of the scrolling text. I recommend you leave it at Normal and once on the display, decide if it should be moving faster or slower. Click on Import.
- Now, just add a text box to the bottom of the screen and enter your text. Preview and Save the presentation.
AVOID THIS TRAP: the text box cannot overlay the scrolling text box. If you attempt to save it and both scrolling text and text boxes are touching or overlapping, you will get an error. Just change the size of the text box by clicking on it and then grabbing a handle and dragging it in.

Play the video below to see what the finished presentation looks like!