Venus Control Suite Onboarding
Welcome to Venus Control Suite. This journey empowers you to learn about your new software at your own pace – taking each module in order or moving to the section you want to focus on.
Creating Display Ready Content
Managing Content in Venus Control Suite
Venus Control Suite allows you to upload media files, create content and schedule your media within a matter of minutes. This is done by using the Media Library and Playlists found in the Scheduling App. We will start off by going through the Media Library which serves as your central storage location for all uploaded content as well as media created within Venus Control Suite. Venus Control Suite accepts several different media file formats and provides a web-based platform for generating content. Media files need to be stored in the Media Library before scheduling any content in a playlist.
Creating Content in Venus Control Suite
Two content compositors are available, and offer have different advantages. Web Editor allows you to create content pieces within a matter of minutes. You're able to add multiple slides that contain text, date, time or temp, and media items from your media library! Content Studio allows you to add text and images with transitions and effects.
Web Editor - Content Creation
Let's start with the Web Editor which is accessible on any internet enabled device. This can be accessed by clicking the blue arrow drop down to the right of the "Add New" button and selecting "New Web Presentation" OR access this from the "My Apps" menu in the upper right hand corner. Learn to create various presentations by viewing the below videos!
How do I create time, temp, and date messages with Web Editor in Venus Control Suite?


Easy Drop Weather
Use Easy Drop Weather to become the go-to weather provider in your area! Easy Drop Weather allows you to easily pull in the current temperature, weather conditions, as well as images showing the current weather. You're also able to pull in a forecast up to 7 days in the future to show the high and low temperature for those days, the weather conditions and images showcasing those weather conditions.
Data Paging
With Data Paging you can set up data feeds that scroll through item lists automatically. This eliminates manual set up and schedules items to cycle through in order and for the duration you give each item.
Web Editor - Content Templates
Within the Venus Control Suite Web Editor you can create templates that are easily modifiable to have a consistent look for your menu boards or anywhere else you might use them! Templates often contain backgrounds with sample images and text that users can modify and save a presentation based on the content.
Content Studio
Users have the option to create media files called presentations with the Daktronics Content Studio application. Once downloaded, launch Content Studio through Venus® Control Suite. To download the Content Studio software, visit daktronics. com/contentstudio. In this section you will learn about adding layouts, importing media, adding data fields and more.
How do I download Content Studio for Venus Control Suite?
Layout Editor
The Layout Editor interface is an all-in-one canvas that allows you to create a unique look for your display. With options for laying and zoning such as an L-Bar, U-Bar, and Overlay, the options are endless! This will control how the display transitions to a new look including effects and dynamically changing the size and position of a zone. For example, you could have the weather displayed on the bottom of your display while still showing your regular messaging in the upper portion.
LED Best Practices
When creating content, ensuring you're following Best Practice guidelines is key to success. Daktronics provides you with detailed information on how you can achieve the best content to visually appeal to your audience. With these simple tips, you'll be creating content that leaves an impression on all those that pass by!

LCD Best Practices
Whether you’re an experienced graphic designer or just learning the ropes, this guide will help you maximize your most effective advertising medium—your digital display. You’ll learn the importance of content and how it can enhance your brand, influence customer decisions, elevate their experience in your store, and even amplify your other marketing channels.
Creating content for LCD displays is different from traditional media, so we’ll break down the entire process. You'll learn about good design principles, common mistakes to avoid, and find inspiration for your own designs.
Download a copy to discover exciting ways to communicate with everyone who passes your digital display. As you create content, refer to this guide often. Keep track of what works and what does not. Be sure to take notes in the provided lines and share your policies with everyone creating content.
Sending Content to Display
Scheduling Content to Display
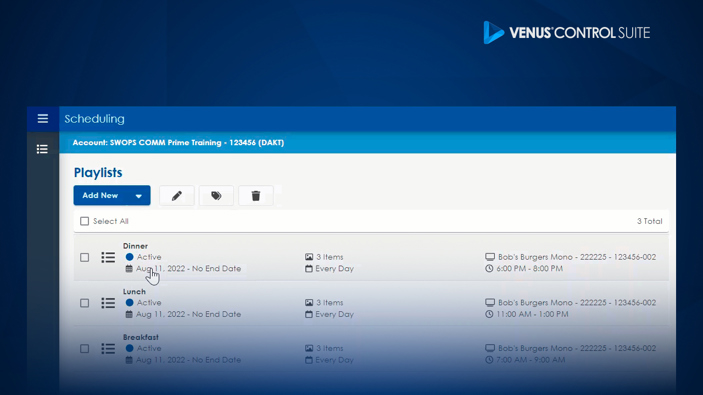
The Scheduling App simplifies scheduling to multiple displays and makes adjusting playlist properties a breeze.
Create playlists by clicking the blue add new button, and they will be sent to the display once saved, and active. We suggest grouping similar content in playlists to help with organization. For example, put all of your Morning Breakfast content in one and Afternoon Lunch content in another. Or for schools, put your announcements in one and sport schedules in another. You can customize each playlist by setting duration, date ranges, time of the day, and days of the week to control when your content is displayed. You can also take that one step further and set up specifications on individual media files.
Multi-Select Blog Article
Multi-Select can be used on playlist properties or within a playlist to focus on multiple file properties. To understand better, let’s focus on playlist vs. individual files.
Scheduled Content Report
Are you curious about what content you have scheduled on your Daktronics display? The Scheduled Content View in the Scheduling App can give you a clear visual representation of your daily scheduled content.
Venus Scheduling: How do I view my scheduled content in Venus Control Suite?
FrameWrx Onboarding
Creating Display Ready Content
FrameWrx enables anyone, anywhere to design graphics and animations for digital boards and ideal for business and community content creation. This annual subscription gives two users access to this online software where they can create and export content. Choose from a variety of professionally designed templates, edit the text, and personalize with your business’s colors, fonts, photos, and logo. Or, design content from scratch! This version is perfect for maximizing the power of digital displays and social communication to amplify advertising and influence customer decisions.
What can I do with FrameWrx?

FrameWrx empowers individuals of any skill level to create professional, animated content for digital displays using Daktronics-designed templates. Whether you're showcasing sales, announcements, holiday messages, or services, FrameWrx makes it easy to build eye-catching visuals that are screen-specific and brand-consistent. The intuitive cloud-based platform has strategic designs to ensure your content looks sharp across digital displays, social media, or print, with no creative team or technical setup required. With FrameWrx, your business or organization can deliver a polished visual experience that connects with your audience and elevates your message.
Create Brand and Best Practices
Brands give the ability to categorize and apply design elements to accounts and templates in Framewrx.

FrameWrx’s Brand Assets hub makes it easy to keep your content visually consistent and on-brand. By uploading your business’s logos, fonts, colors, photos, and videos into the platform, your team can access everything they need to create cohesive, professional-looking graphics. This ensures every template reflects your brand identity, no matter who’s designing. When an admin uploads these assets, designers can quickly build content that aligns with your business’s look and feel across digital signage, social media, and more.
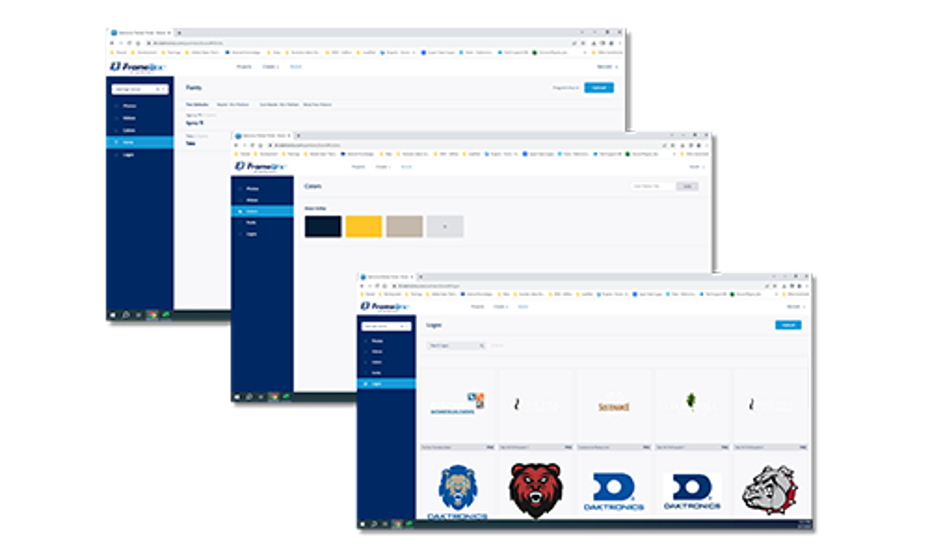
Add Brand Assets
Under each Brand you can store photos, fonts, colors, and logos. Photos must be PNG or JPEG files and can be tagged for easy filtering. Fonts must be .ttf, .otf, or .woff files. You can add fonts for specific styles and set defaults. Colors will render as each palette that you have made per Brand. They can preview as either CMYK/SPOT or RGB. Logos must be an SVG file. You can upload design elements for simple placement onto a design.
Projects and Templates

Create New Project from Templates
Templates are the starting point for your designs. These templates cover a wide range of content needs, such as sales, announcements, holidays, and service offerings. You can customize them with your brand assets (logos, colors, fonts, etc.) to ensure every piece of content looks polished and on-brand. Templates save time, eliminate guesswork, and make it easy for anyone, regardless of design experience, to produce high-quality visuals.
How do I create and export display ready content from a Template?
Using Brand Assets
Designers and Admins are able to use Brand Assets directly in the Templates they are creating for users. Each type of asset can be leveraged in a unique way.
Leveraging Brand Assets as an Admin
Photos
When selecting images, you will see a Brand Photo button. It goes to the Brand Photo gallery, where you can add photos or select Brand images while masking images into shapes, SVGs, or setting backgrounds.
Fonts
While setting your font for a text field there is a section directly above System Fonts where you can choose a Brand (if not already chosen) and the fonts specific to that Brand will populate here for use.
Colors
When selecting a color, there is a dropdown above the color section to select a Brand if not already selected. Once selected, your Brand palette will render and you can toggle between any other palettes that have been added to that Brand.
Logos
When selecting images, you will see a Brand Photo button. It goes to the Brand Photo gallery, where you can add photos or select Brand images while masking images into shapes, SVGs, or setting backgrounds.
Leveraging Brand Assets as an End User
Users can also leverage their Brand assets while creating Projects from Templates assigned to them. Admins can choose to leave unlocked the buttons on any element within the design. Users will have the ability to access their own Photos, Logos, Fonts, and Colors if left unlocked on a template.

Uploading Non Brand-Specific Assets
Editor Tools
The Framewrx editor allows you to edit text, add stock images and videos, full motion editing, audio, remove background, and more!

Stock Images
FrameWrx includes free media galleries filled with photos, icons, and videos that can be easily added to your content. These assets are available directly within the editor, making it simple to enhance your visuals. Just search for the media you need, click the tile, and it drops right into your design, no uploading or external sourcing required.

Easy Background Removal
Photo editing features make it easy to design professional-level content. One of these features is the Background Removal Tool, which quickly deletes unwanted imagery that distracts from the subject of your photos or videos.

AI Features: Text-to-Image Generation & Alteration
Create unique images for your content based on text prompts using AI Image Generation and Alteration.
How to Create New Templates

Templates are admin-approved designs that are available for your end users to customize. In order for a design template to be available for your users, it first needs to be published.
Once a Template is published, you will not be able to make any changes to it. The only way to edit a Template would be to find and edit the source Project, re-publish the Template, and delete the existing Template.
Create and Export Projects

How to Create a Blank Project
When creating a new Project, you will have the option to start from scratch or from an existing Template. You can create a new project from two locations, the Create tab or the Projects tab. You can also delete a Project from the Projects tab by clicking on the ellipses and selecting the delete option.
How to Export Projects
Once your content is crafted, it's time to export and put it on your display... or share it across social media and any other channels you choose for utilizing these content pieces.
How do I create and export display ready content from a Template?